
STUDIO BATHROOM DESIGN

One of the most exciting things during the process of a home renovation is the idea of designing your dream bathroom. For interior design lovers, sorting through tile and stone samples and scouting for finishing touches like towel bars and toilet paper holders is high adventure. And if everything goes according to plan, your finished bathroom will bring you endless joy each day. What we are saying is that hotel spa vibes are like the new car smell of the interiors world, ok? But as exciting as bathroom renovation projects are to dream up and plan, they can be equally messy once it’s time to put it all together. Here, we walk you through a recent project in our new studio space and offer up lessons learned..
SCOPE OF WORK
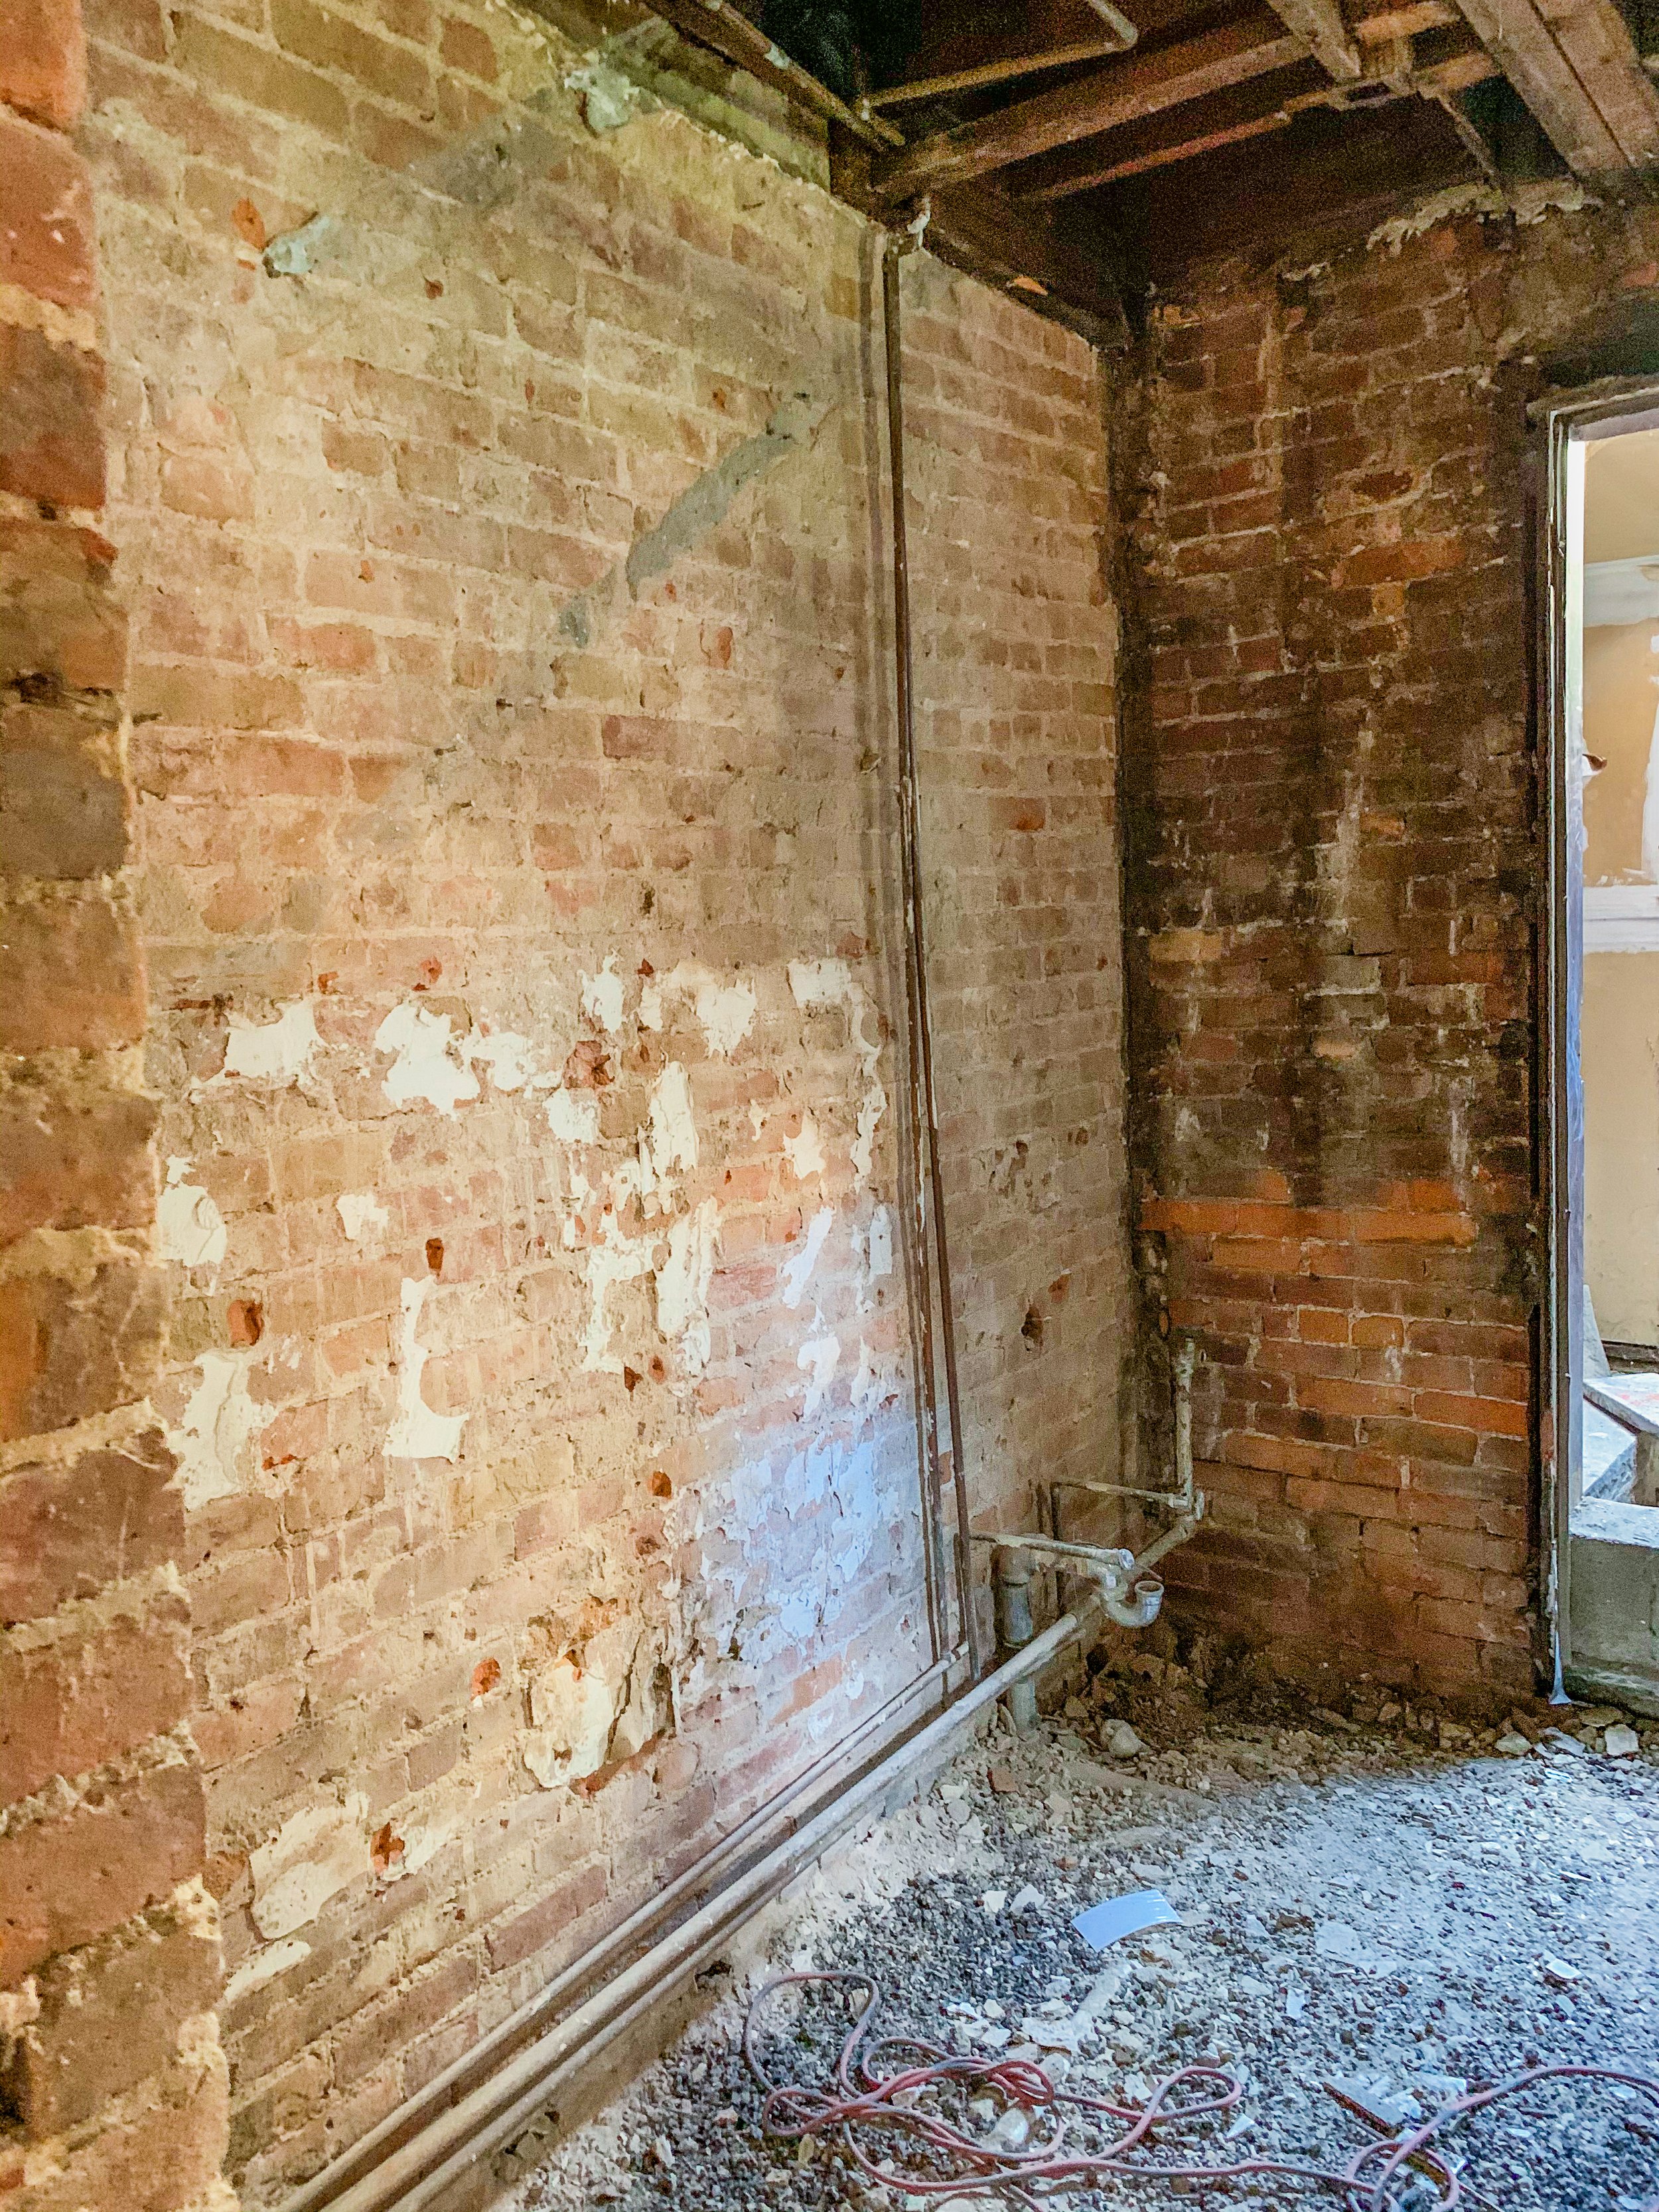

Sometimes you get lucky with bathroom remodels. In many cases the size of your bathroom dictates your options. Keeping the existing layout of the room while replacing your fixtures is the simplest way towards a refresh, and this had been our experience for previous bathroom projects. Replacing a sink and toilet is pretty straight forward, and if the plumbing is in good working order you might not even have to open up the walls.
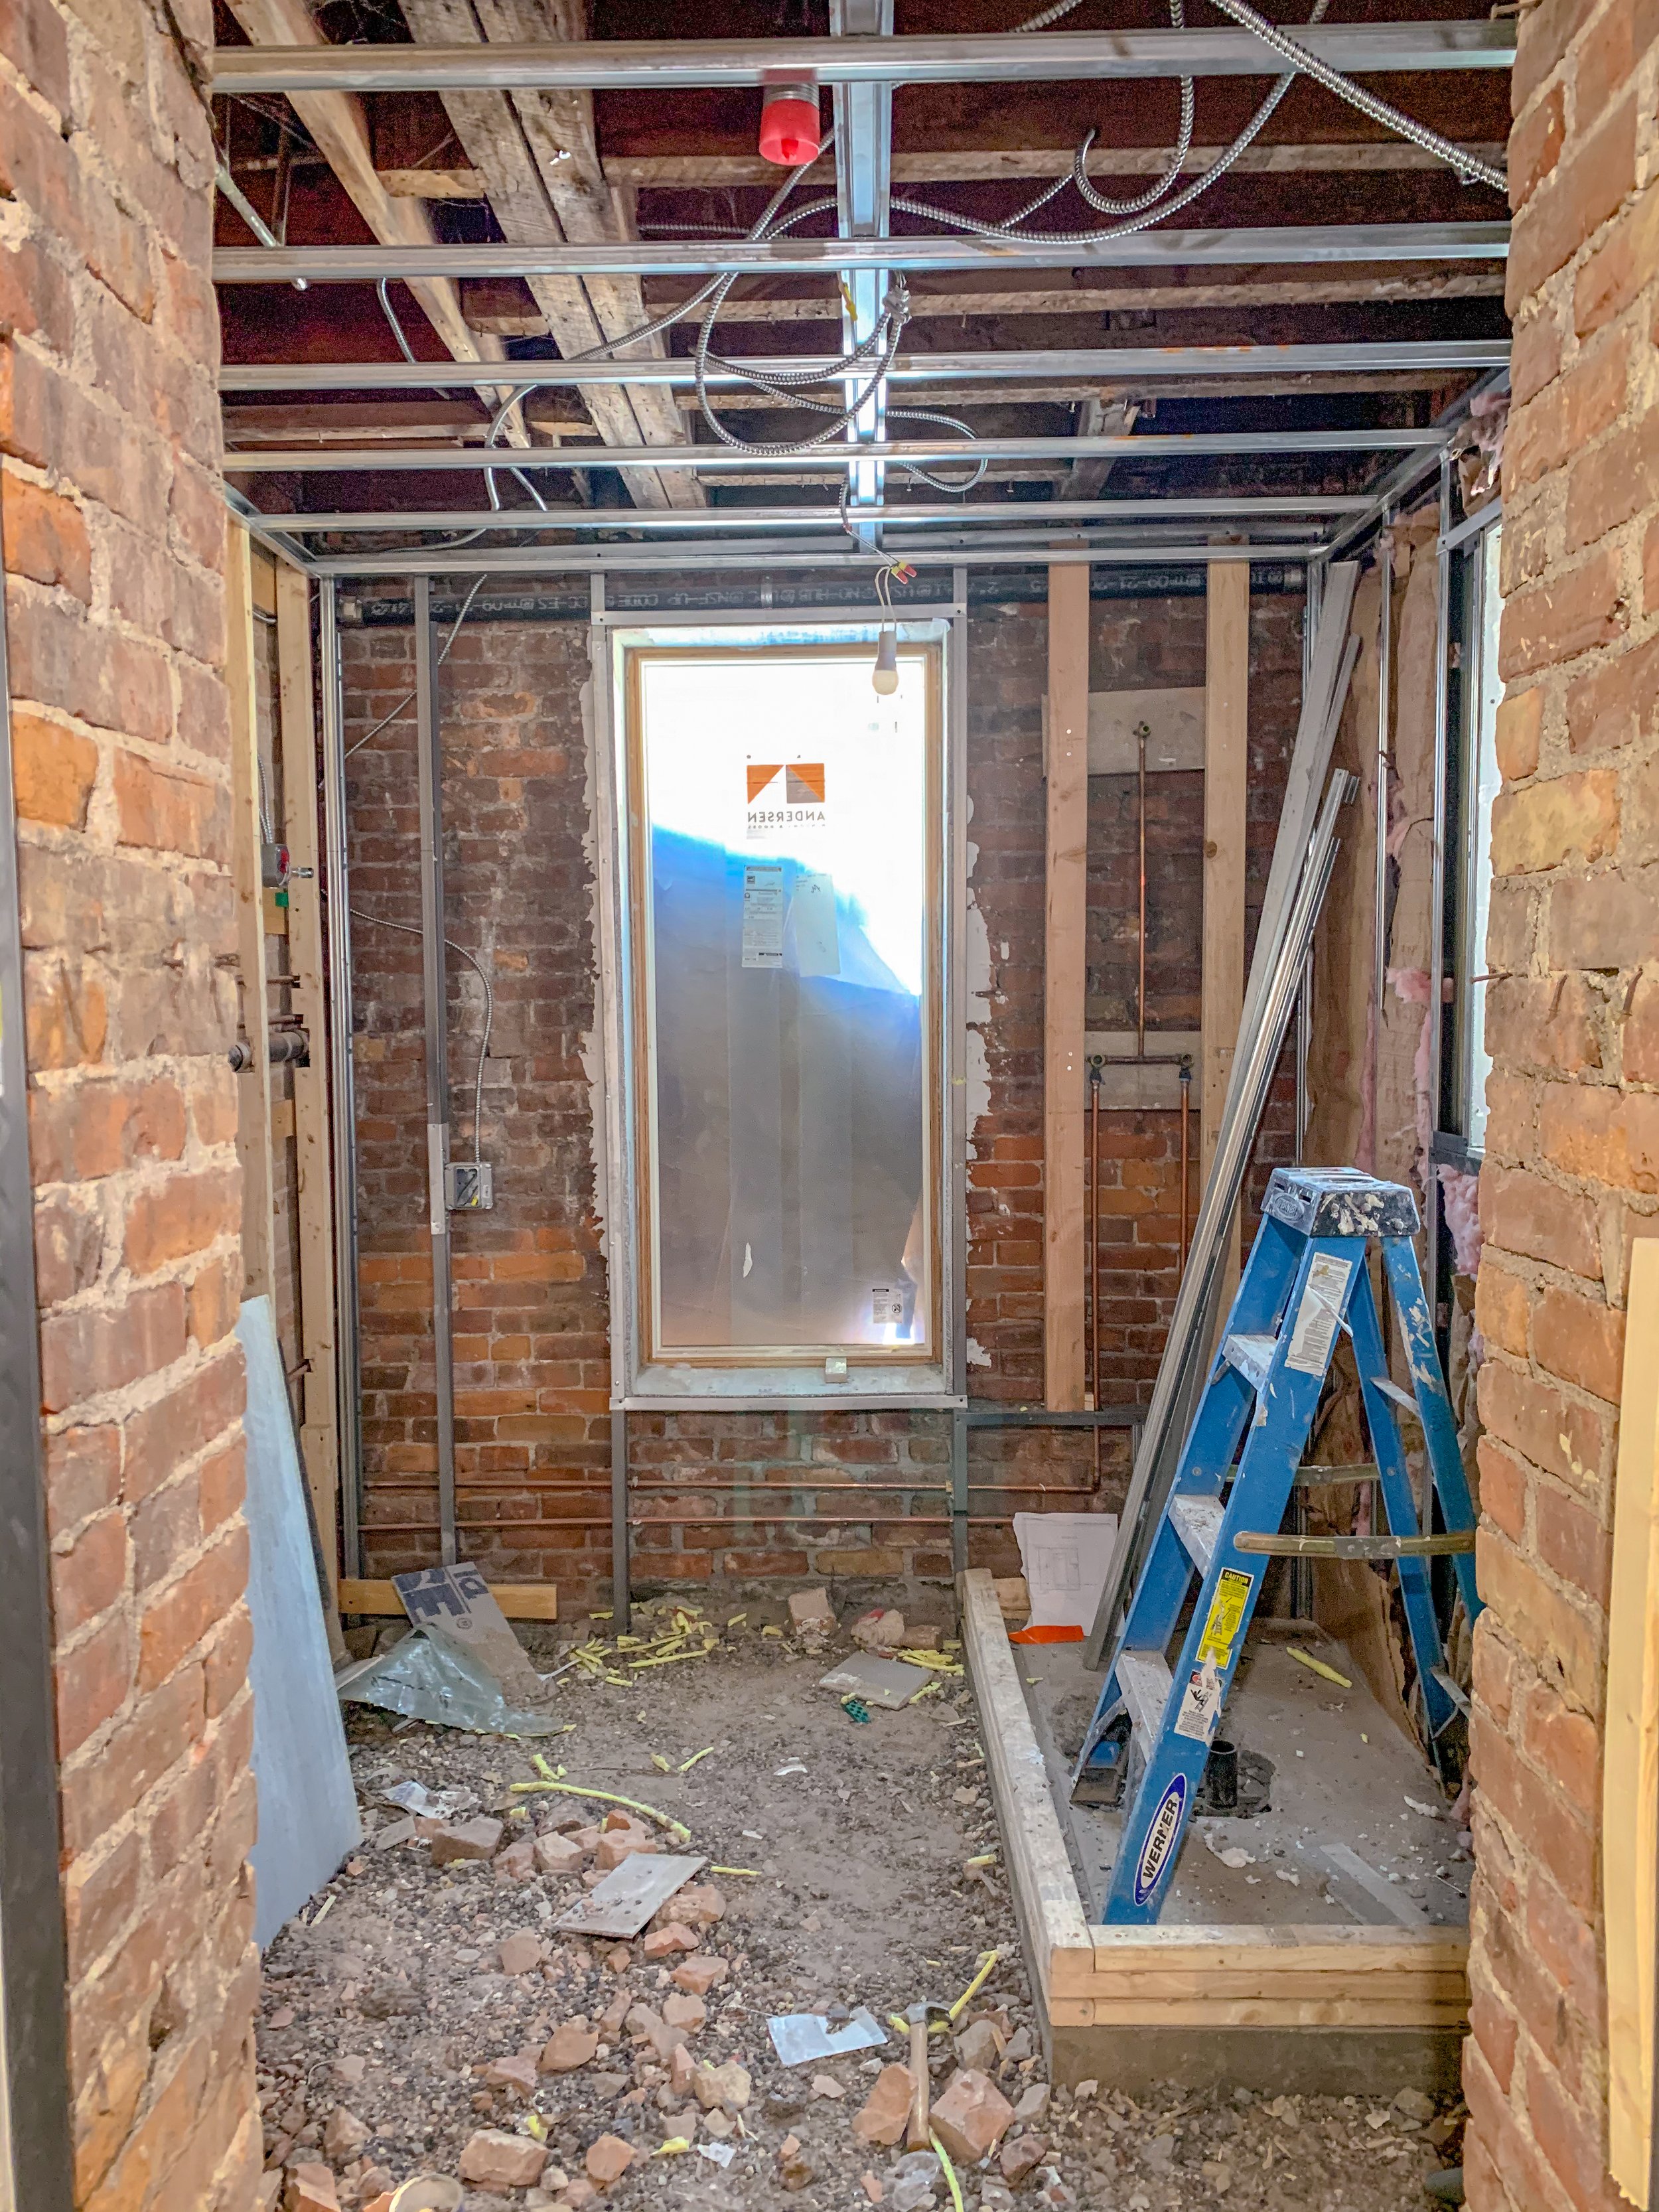
However throughout our new house we found the plumbing in bad shape and a full gut to replace the existing pipes was going to be necessary. Given this reality, and having just enough space to rearrange the room’s layout with the walls removed, we decided to start from scratch.
INSPIRATION + DESIGN GOALS
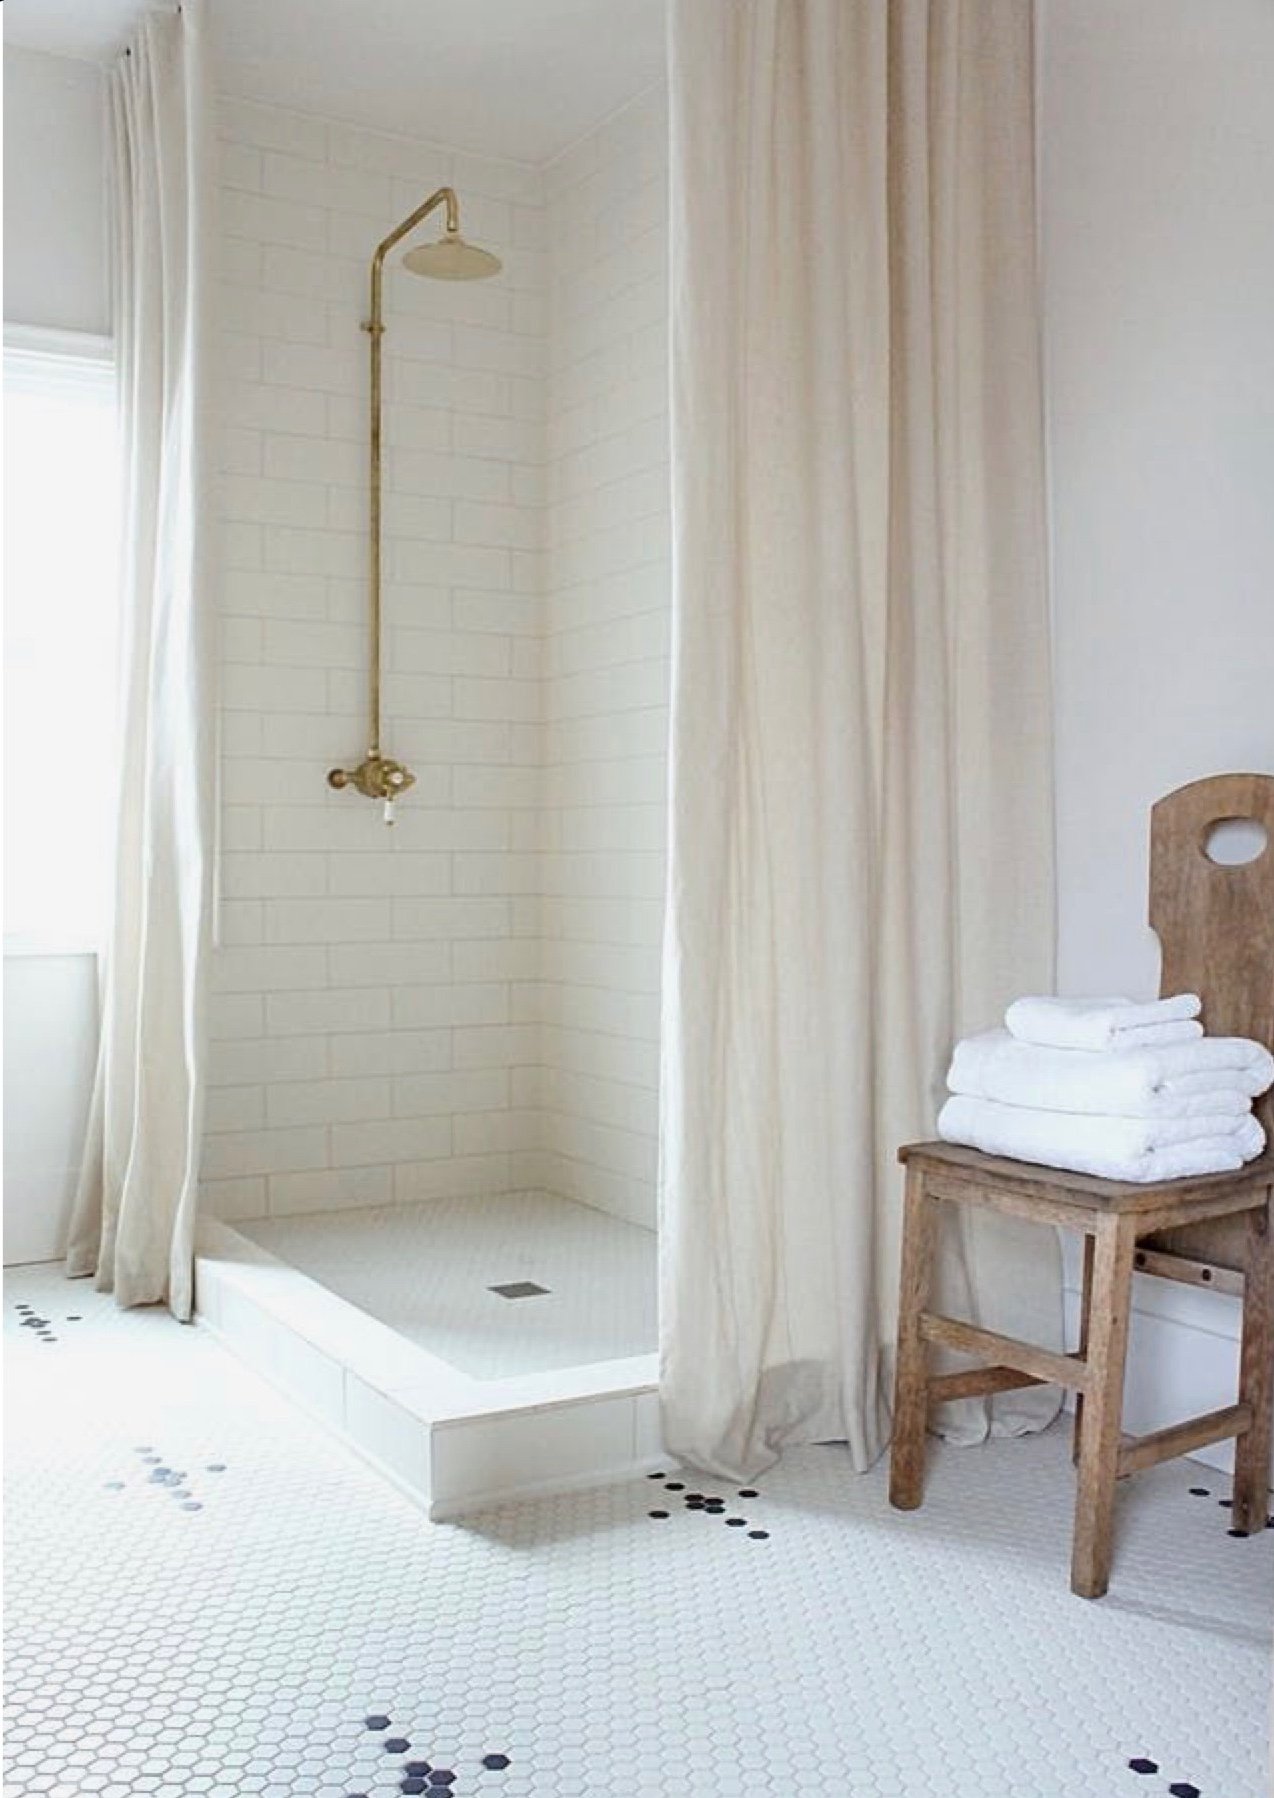
With the freedom to create a new layout our primary goal was to open the space up to maximize sight lines. We wanted to make sure that the views into the bathroom from the open living/kitchen area looked onto pretty details (and not say, the toilet). And with the space functioning as a photo studio, it was also important to stay away from tight corners to allow photographers access to the entire room. We took great pains to make sure that the shower and vanity could be photographed from opposite corners of the room to allow the illusion of a bigger space than is actually the case. To achieve this openness, we fell in love with the shower layout of the above image taken from Pinterest. The corner shower with floor-to-ceiling linen shower curtains offers up a warm, romantic twist while allowing the room to fully open up where a glass shower partition would interfere with photography.
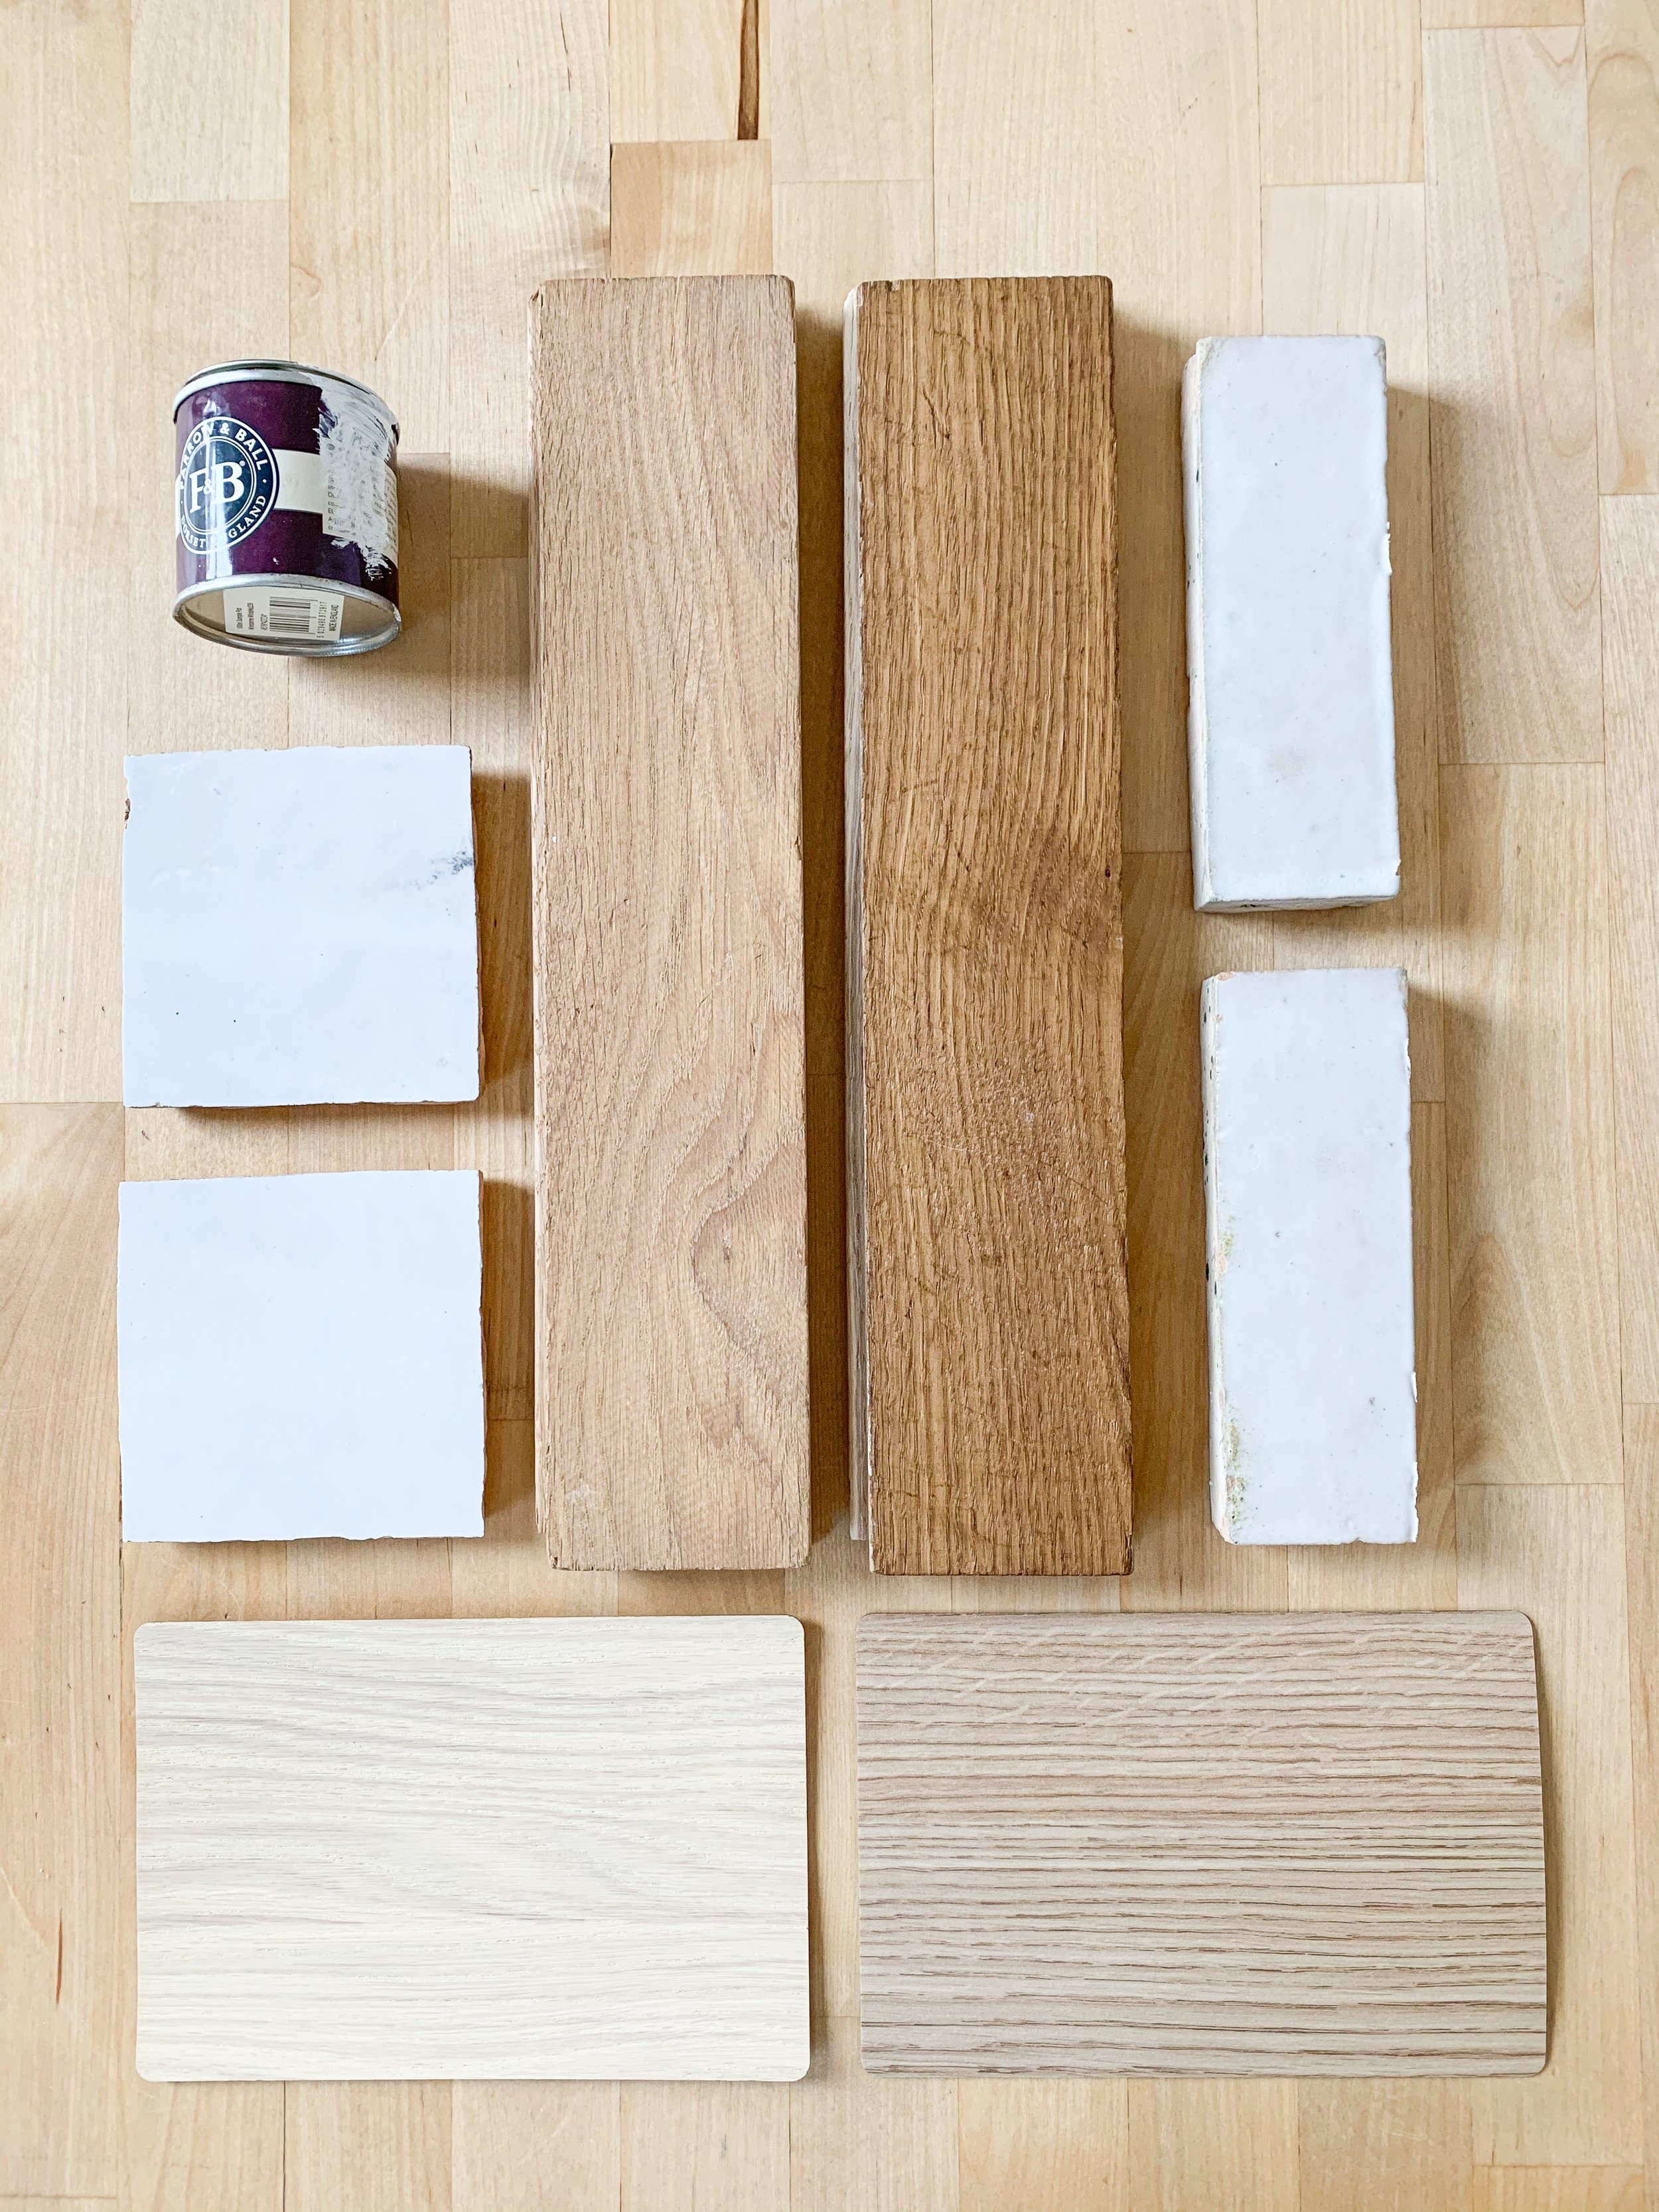
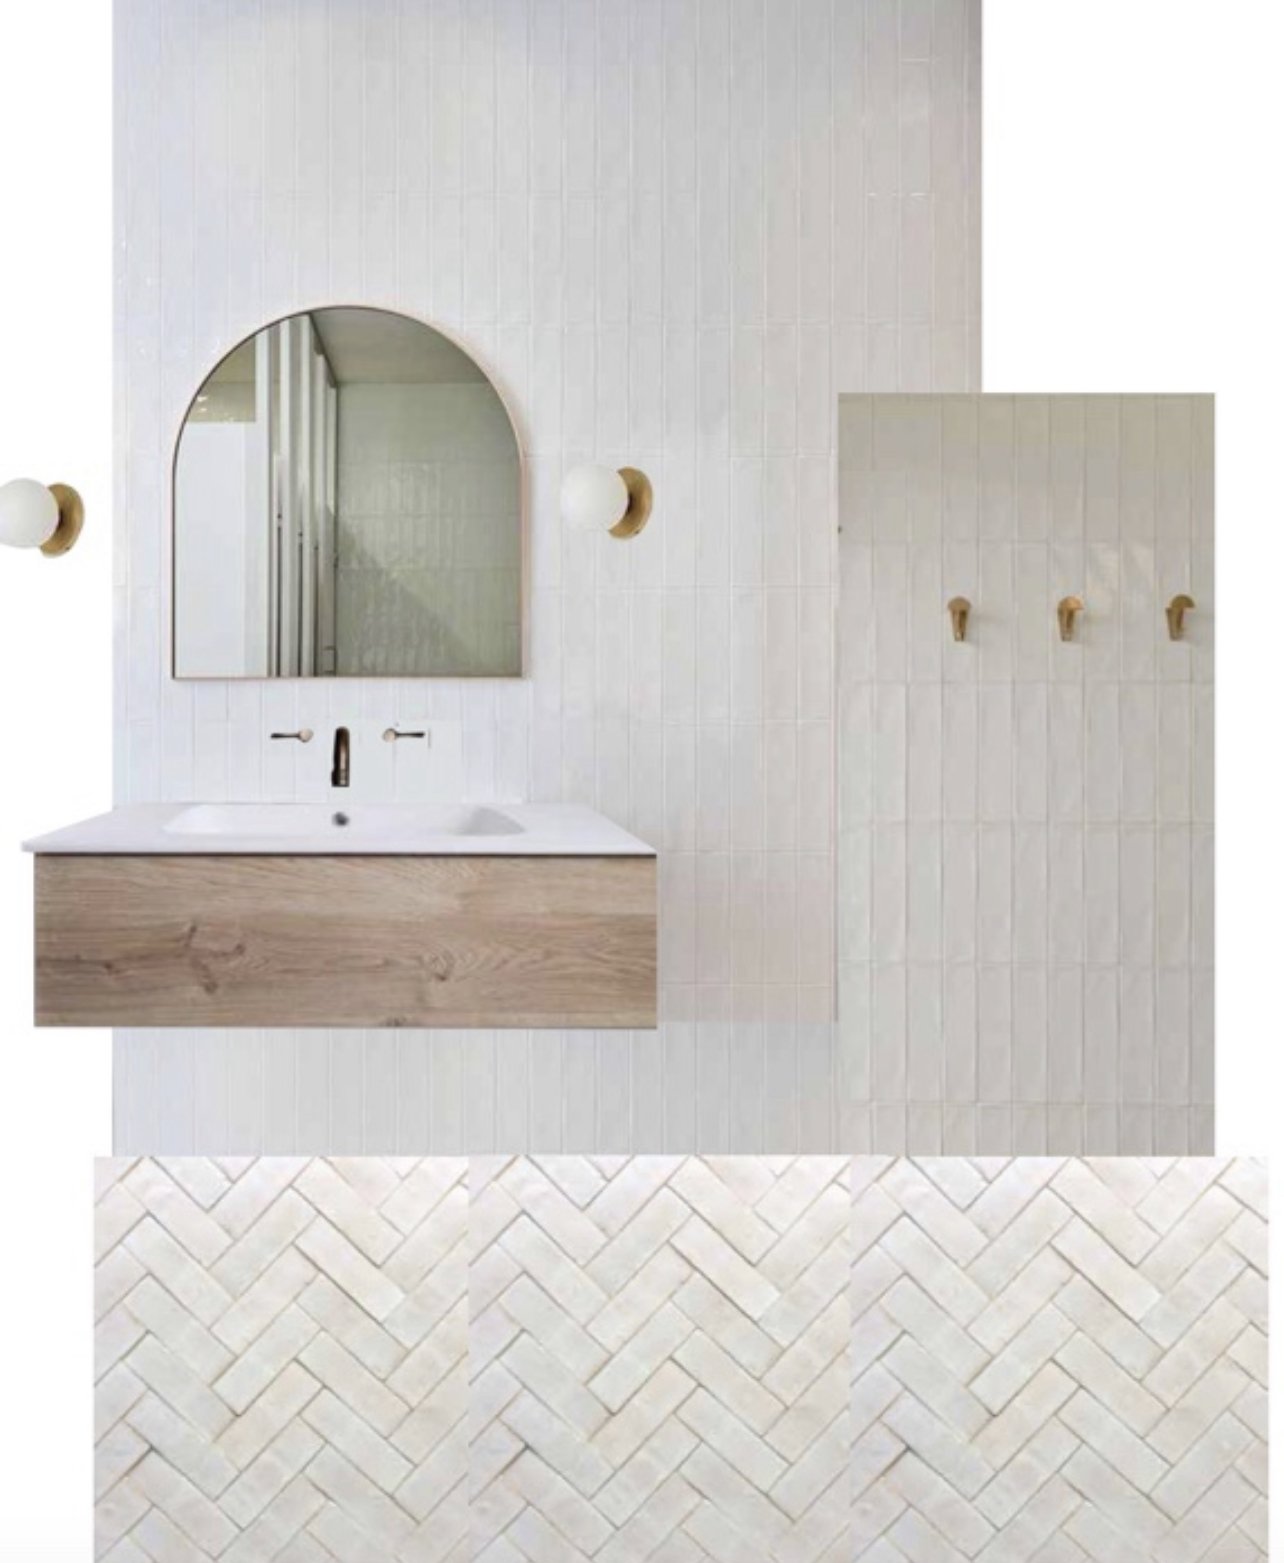
We then looked to dial up the warmth with a shimmery zellige tile to create a jewel box effect, deciding on a warm white to allow the moody northern sunlight exposure to create playful reflective shadows while keeping the room as bright as possible. To contrast the handmade tile, we selected a simple, modern vanity to allow maximum versatility for product and lifestyle photography along with handy storage.
We also converted an existing exterior door into a large picture window and enlarged a secondary window to provide maximum natural light.
MISTAKES MADE + LESSONS LEARNED
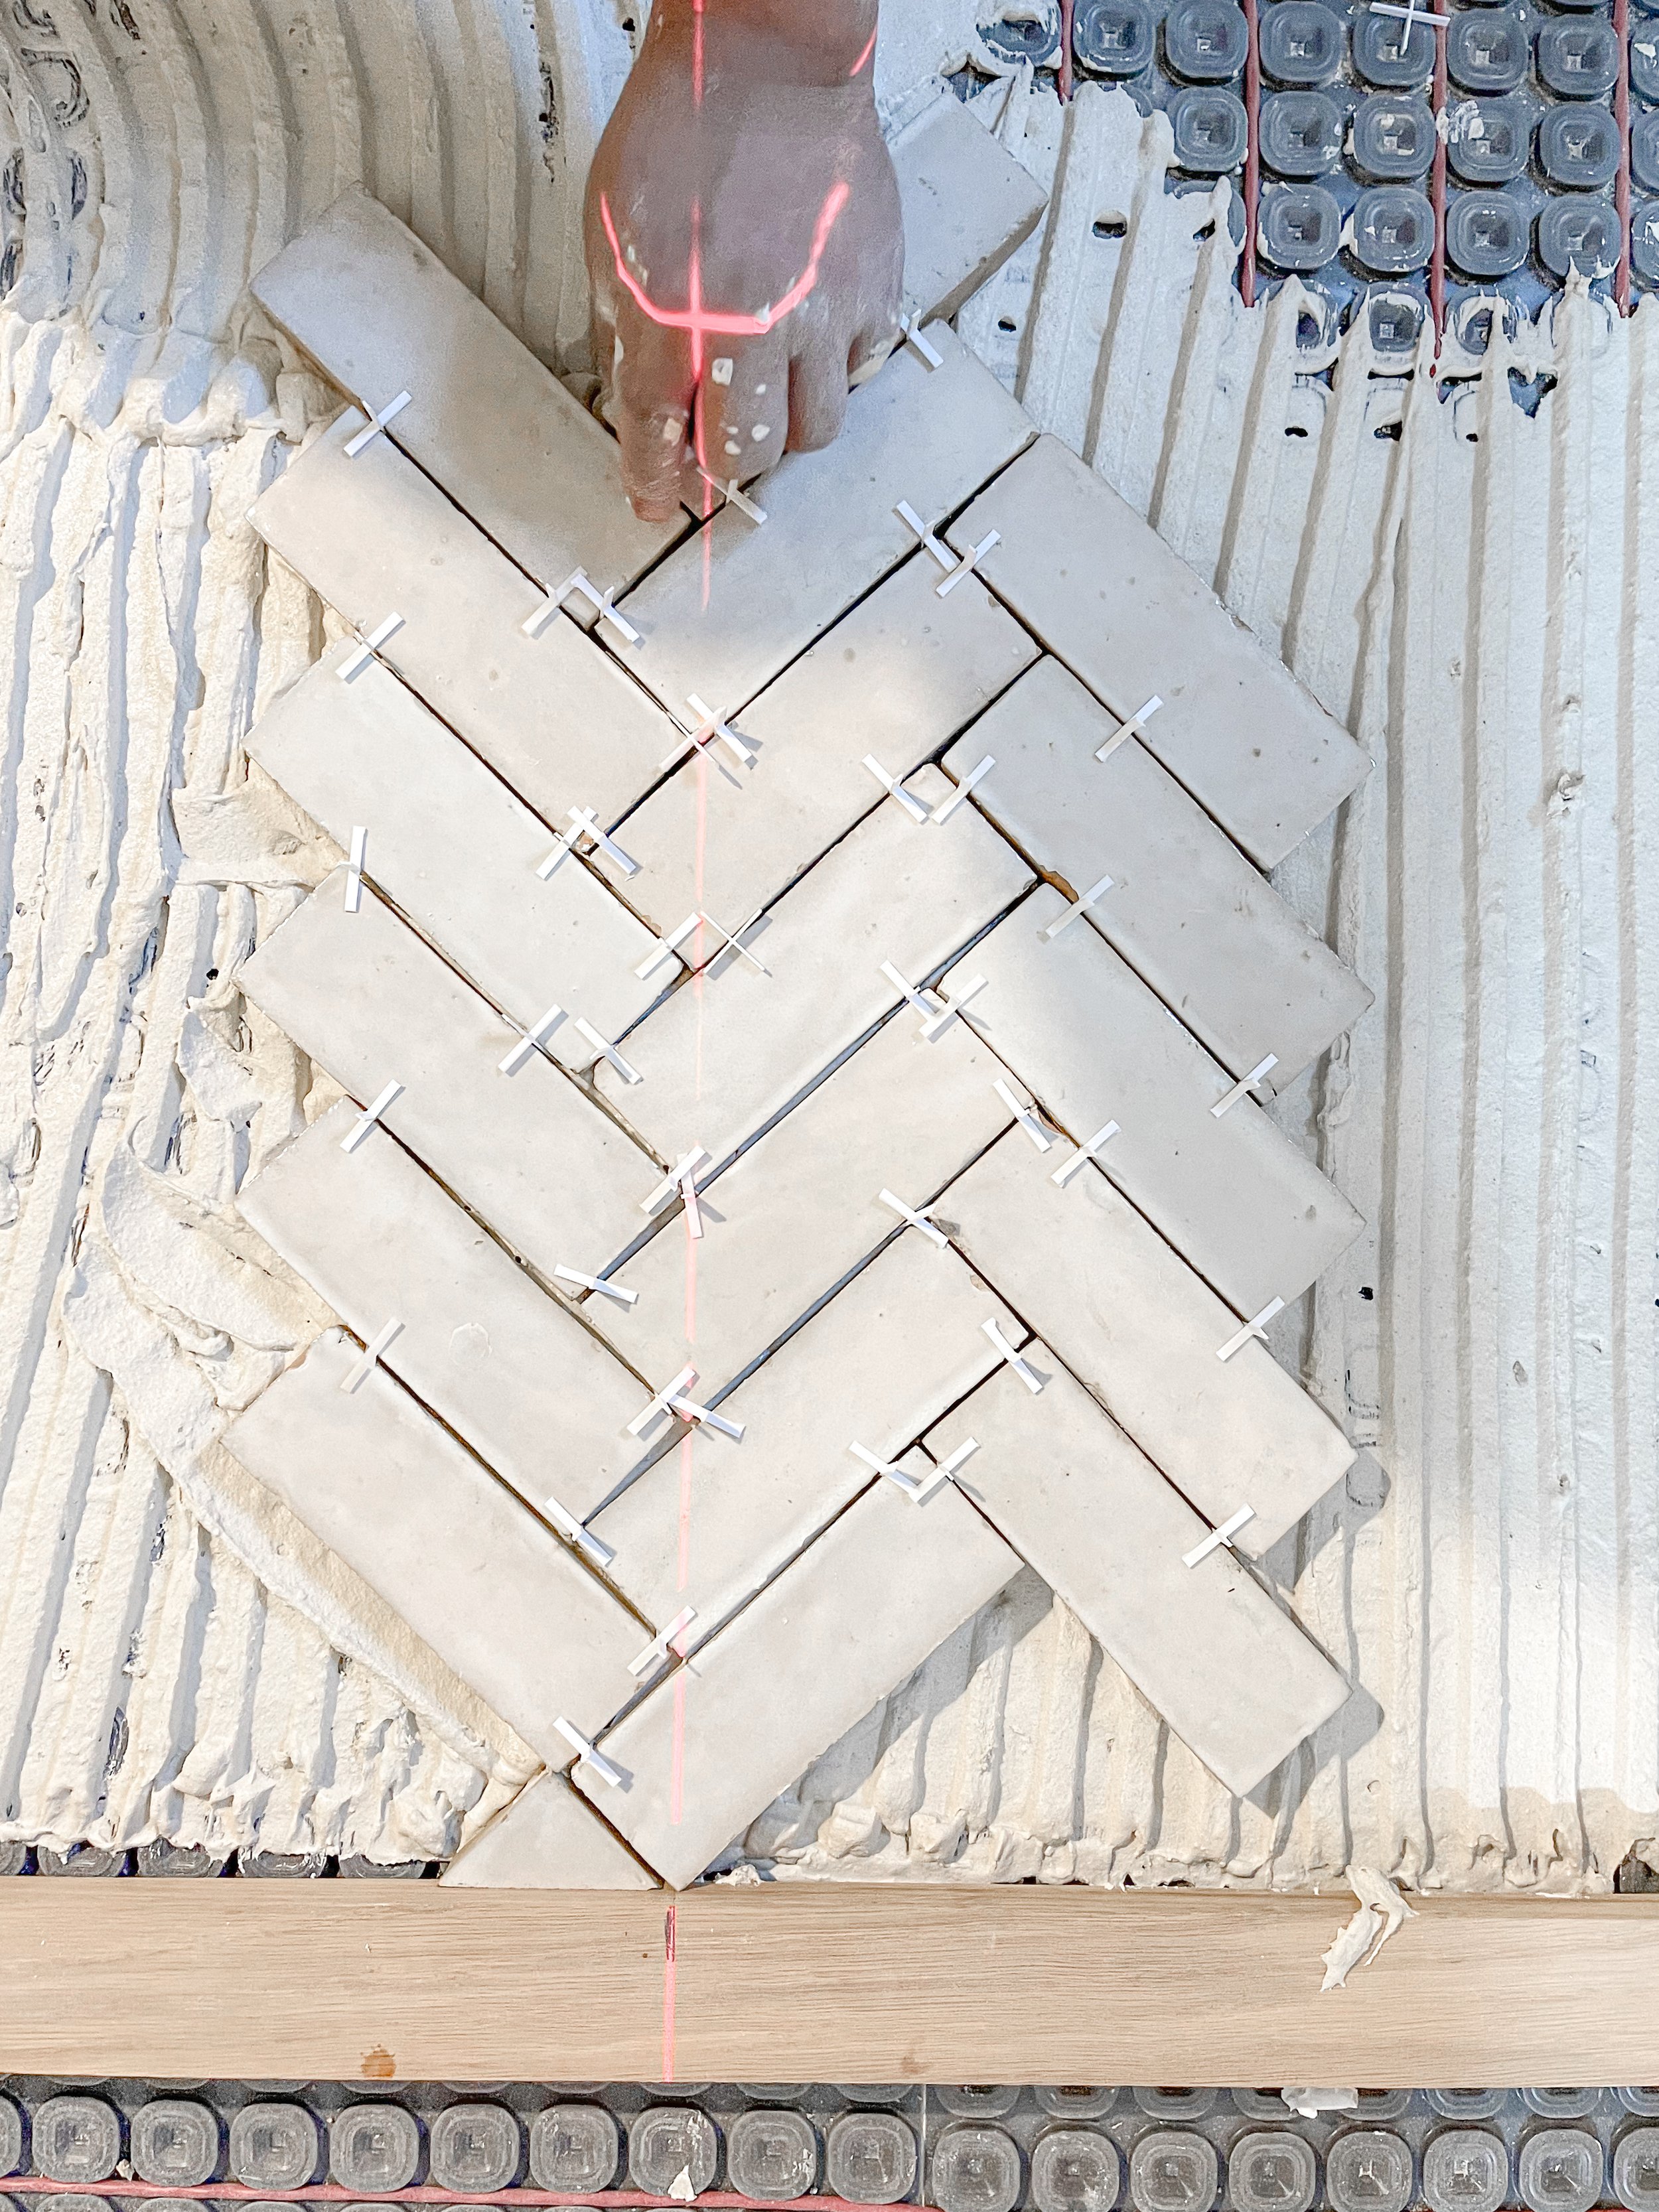

When working with an architect/designer, it’s extremely important to make sure their design elevations are as detailed as possible for the builder. And it’s really handy if the architect can be there at the onset of tiling. Everything from the thickness of the tile, to the area where the tile pattern begins, to the angle the tiles need to be cut at should be gone over in exhaustive detail prior to beginning installation.
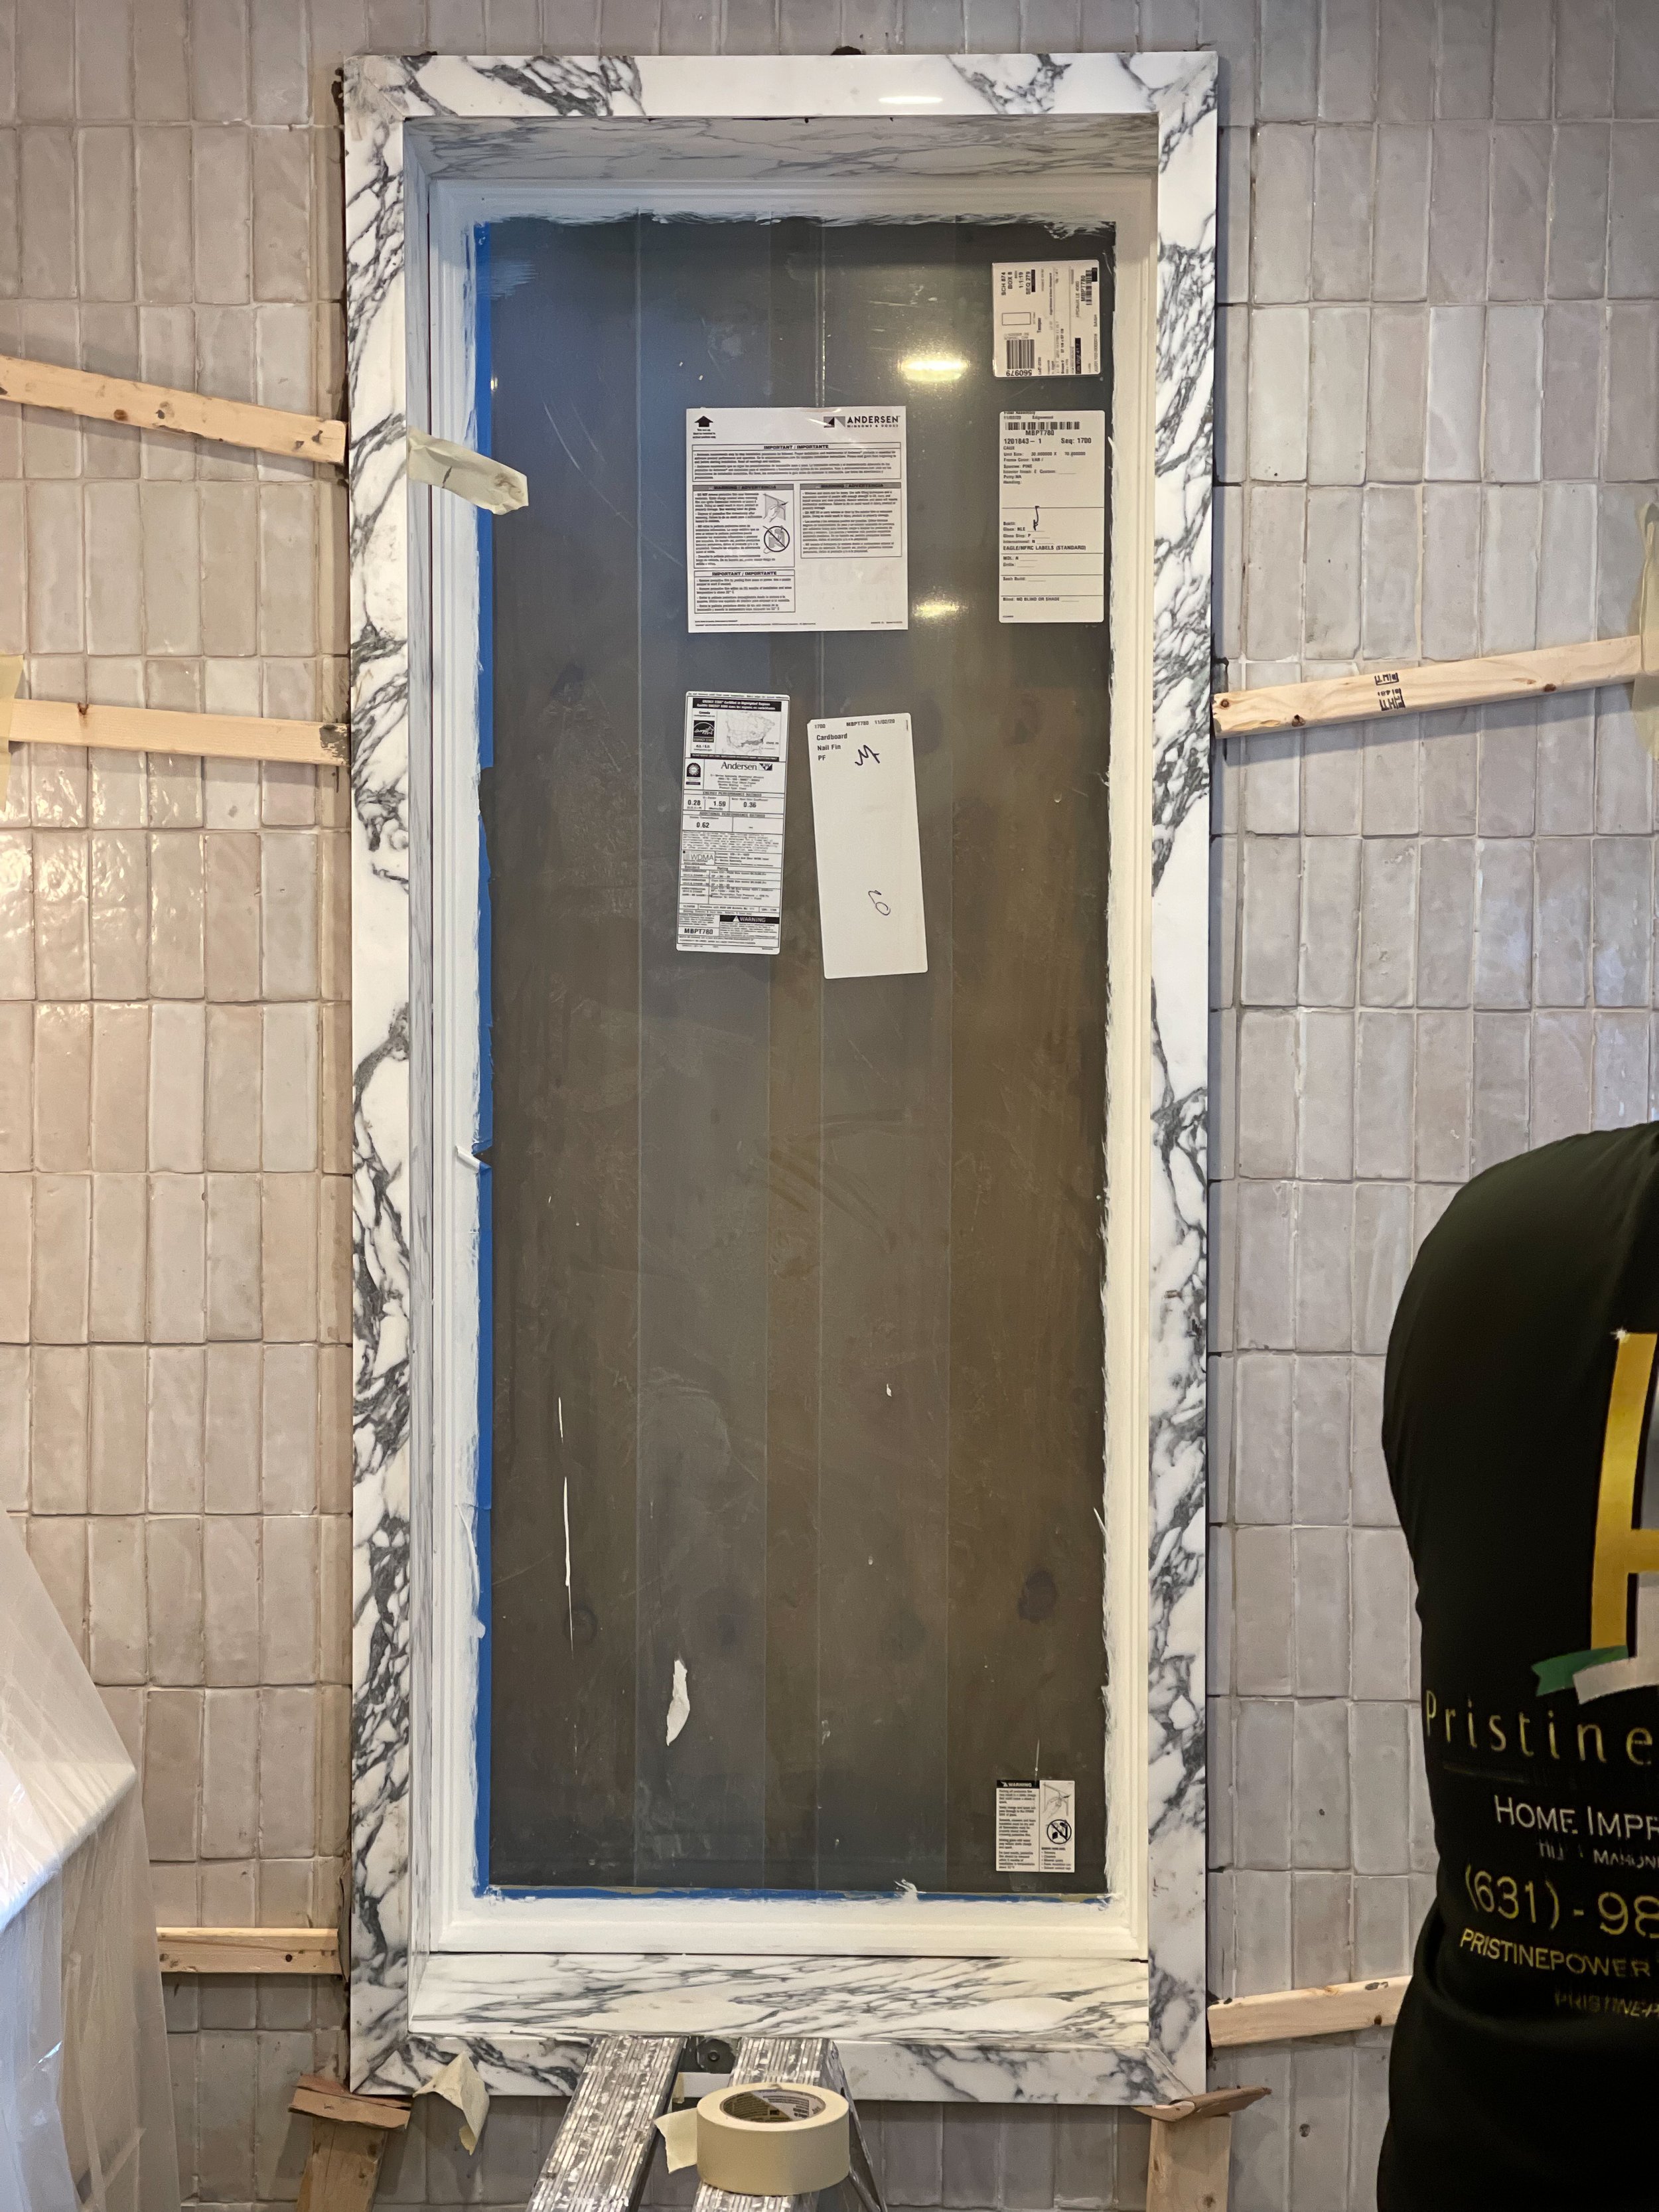
Unfortunately in our case a lack of specifics provided from our architect, combined with a lack of experience working with the zellige tile by our builder, resulted in a large gap around our windows that required us to get creative to find a solution to frame the windows. While the original plan called for the tile to fold into the window casing with mitred corners, in the end we sketched up an idea to add custom marble “picture frames” to surround the windows utilizing the stone extras left over from our kitchen install. And while the experience turned into a happy accident as we love the way the bathroom turned out, having to bring in a marble team to cover these mistakes added cost and time (and a little stress) to the job.
THE FINISHED DESIGN
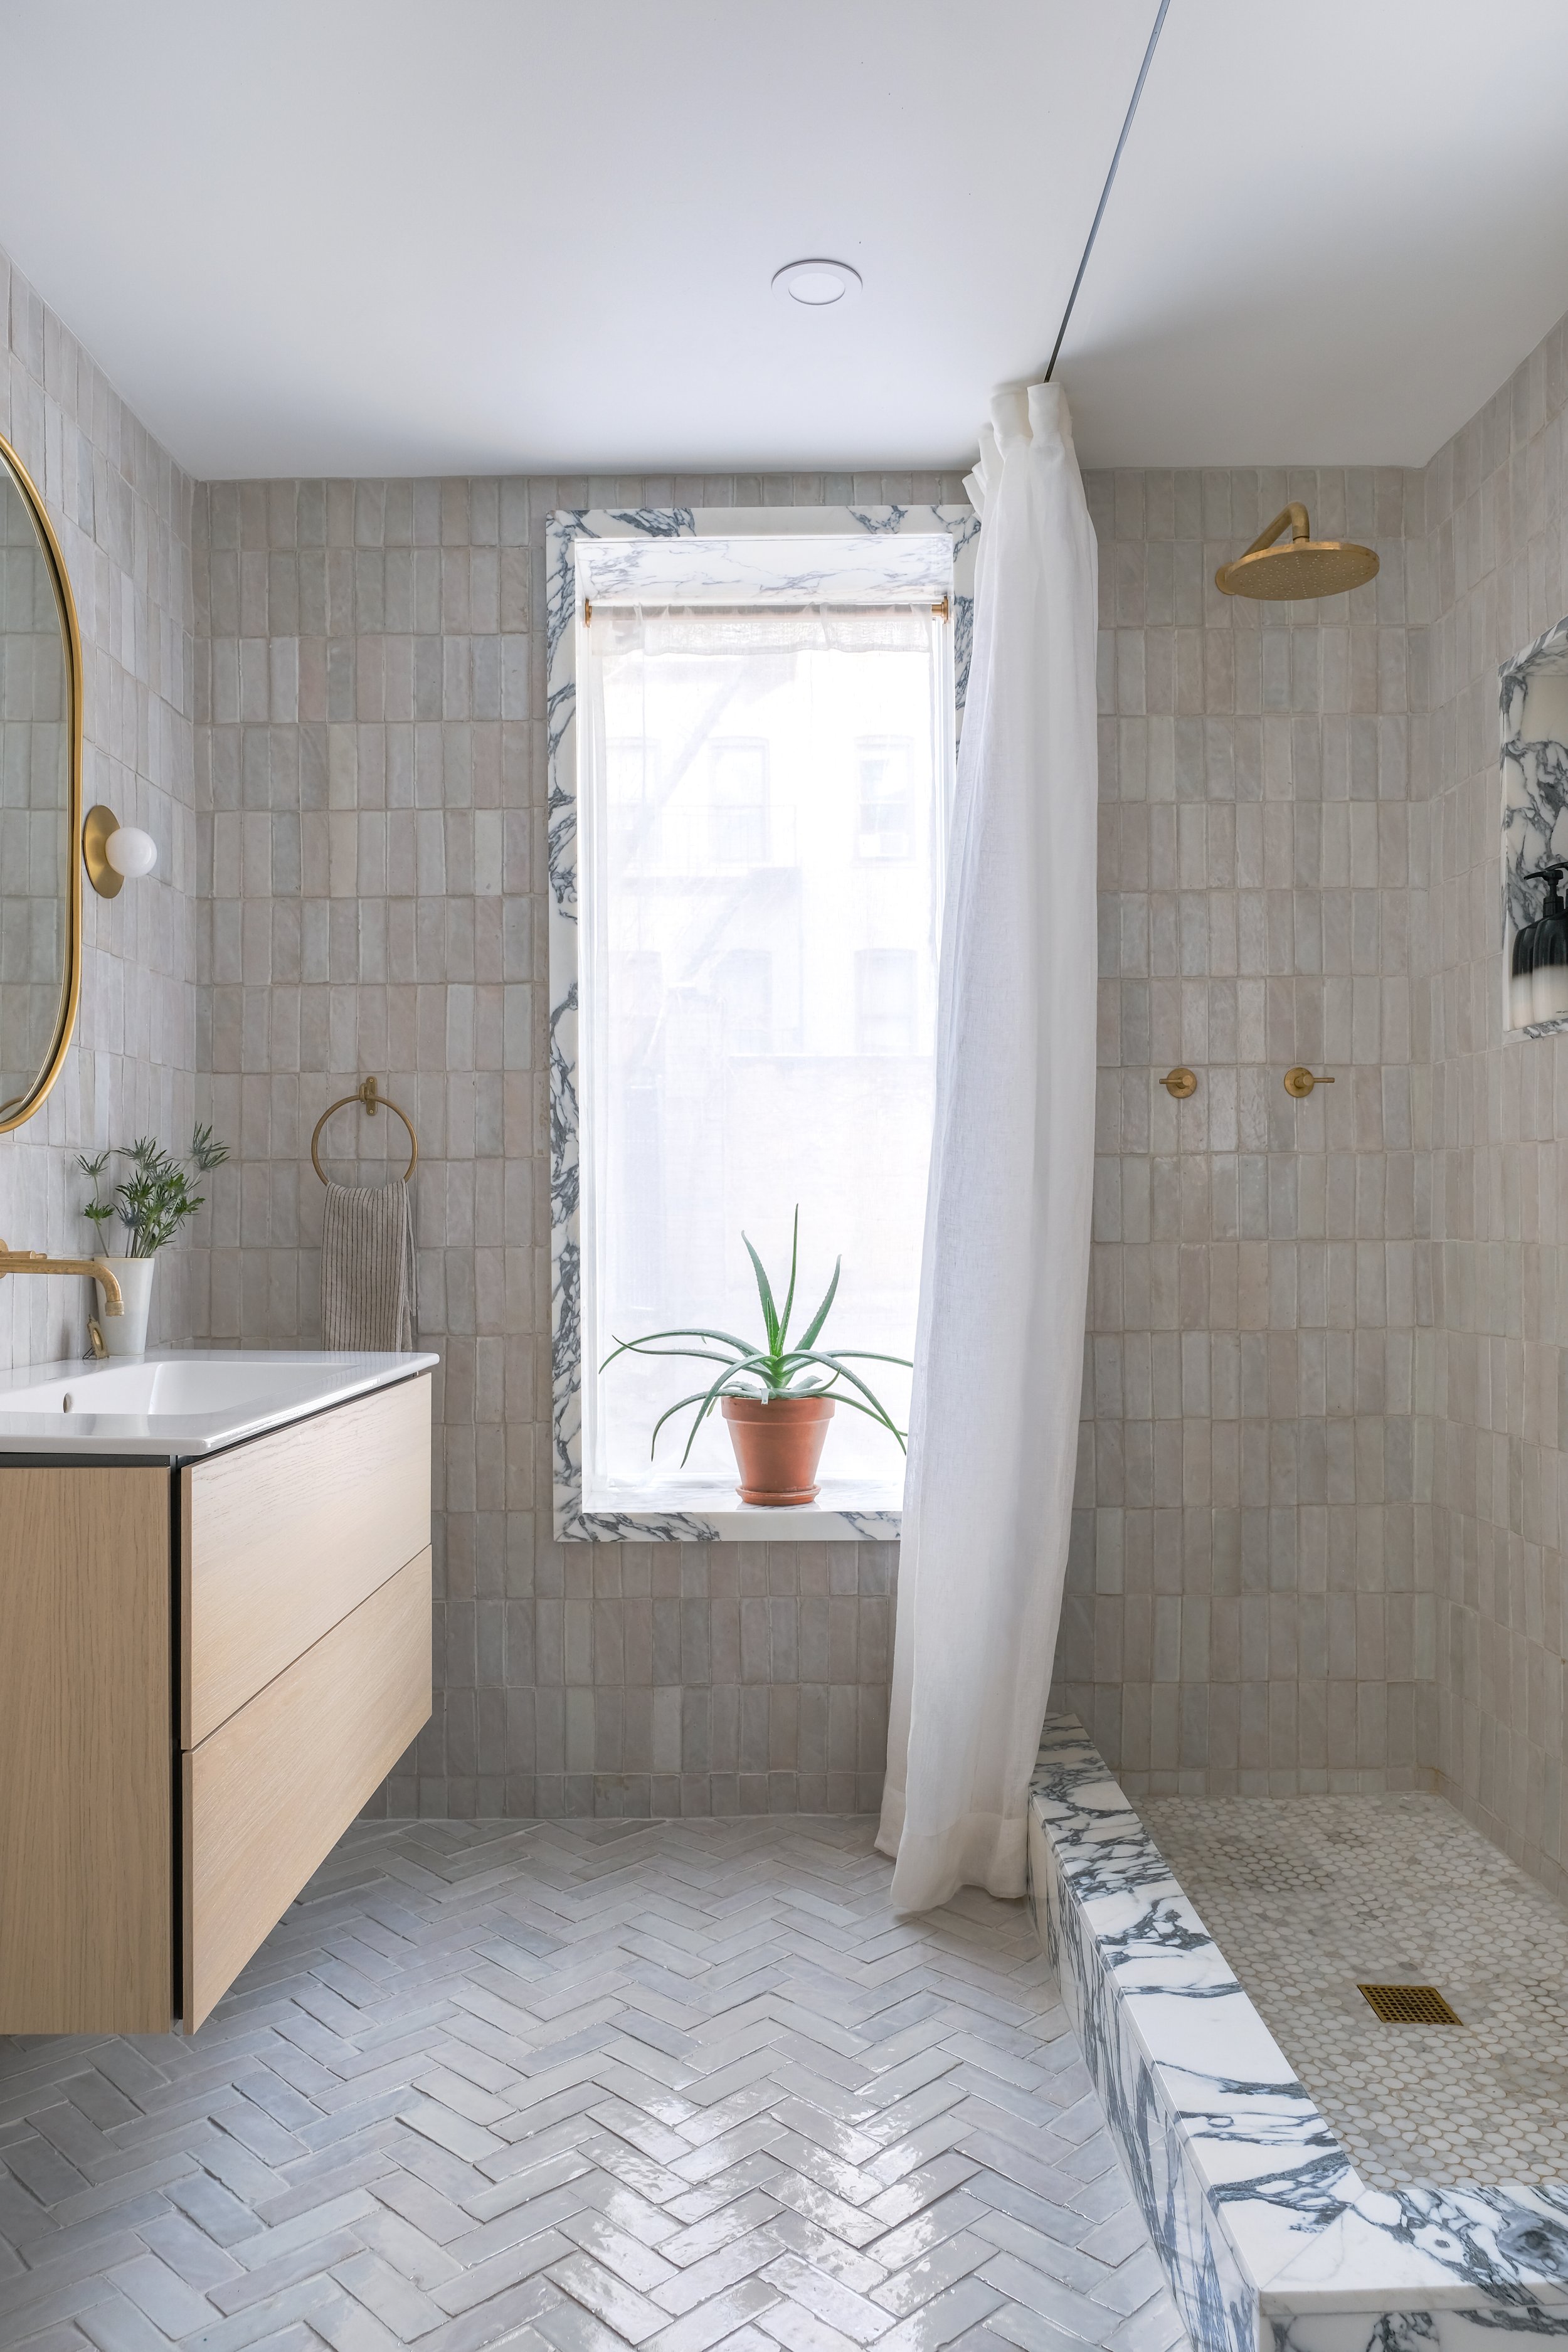
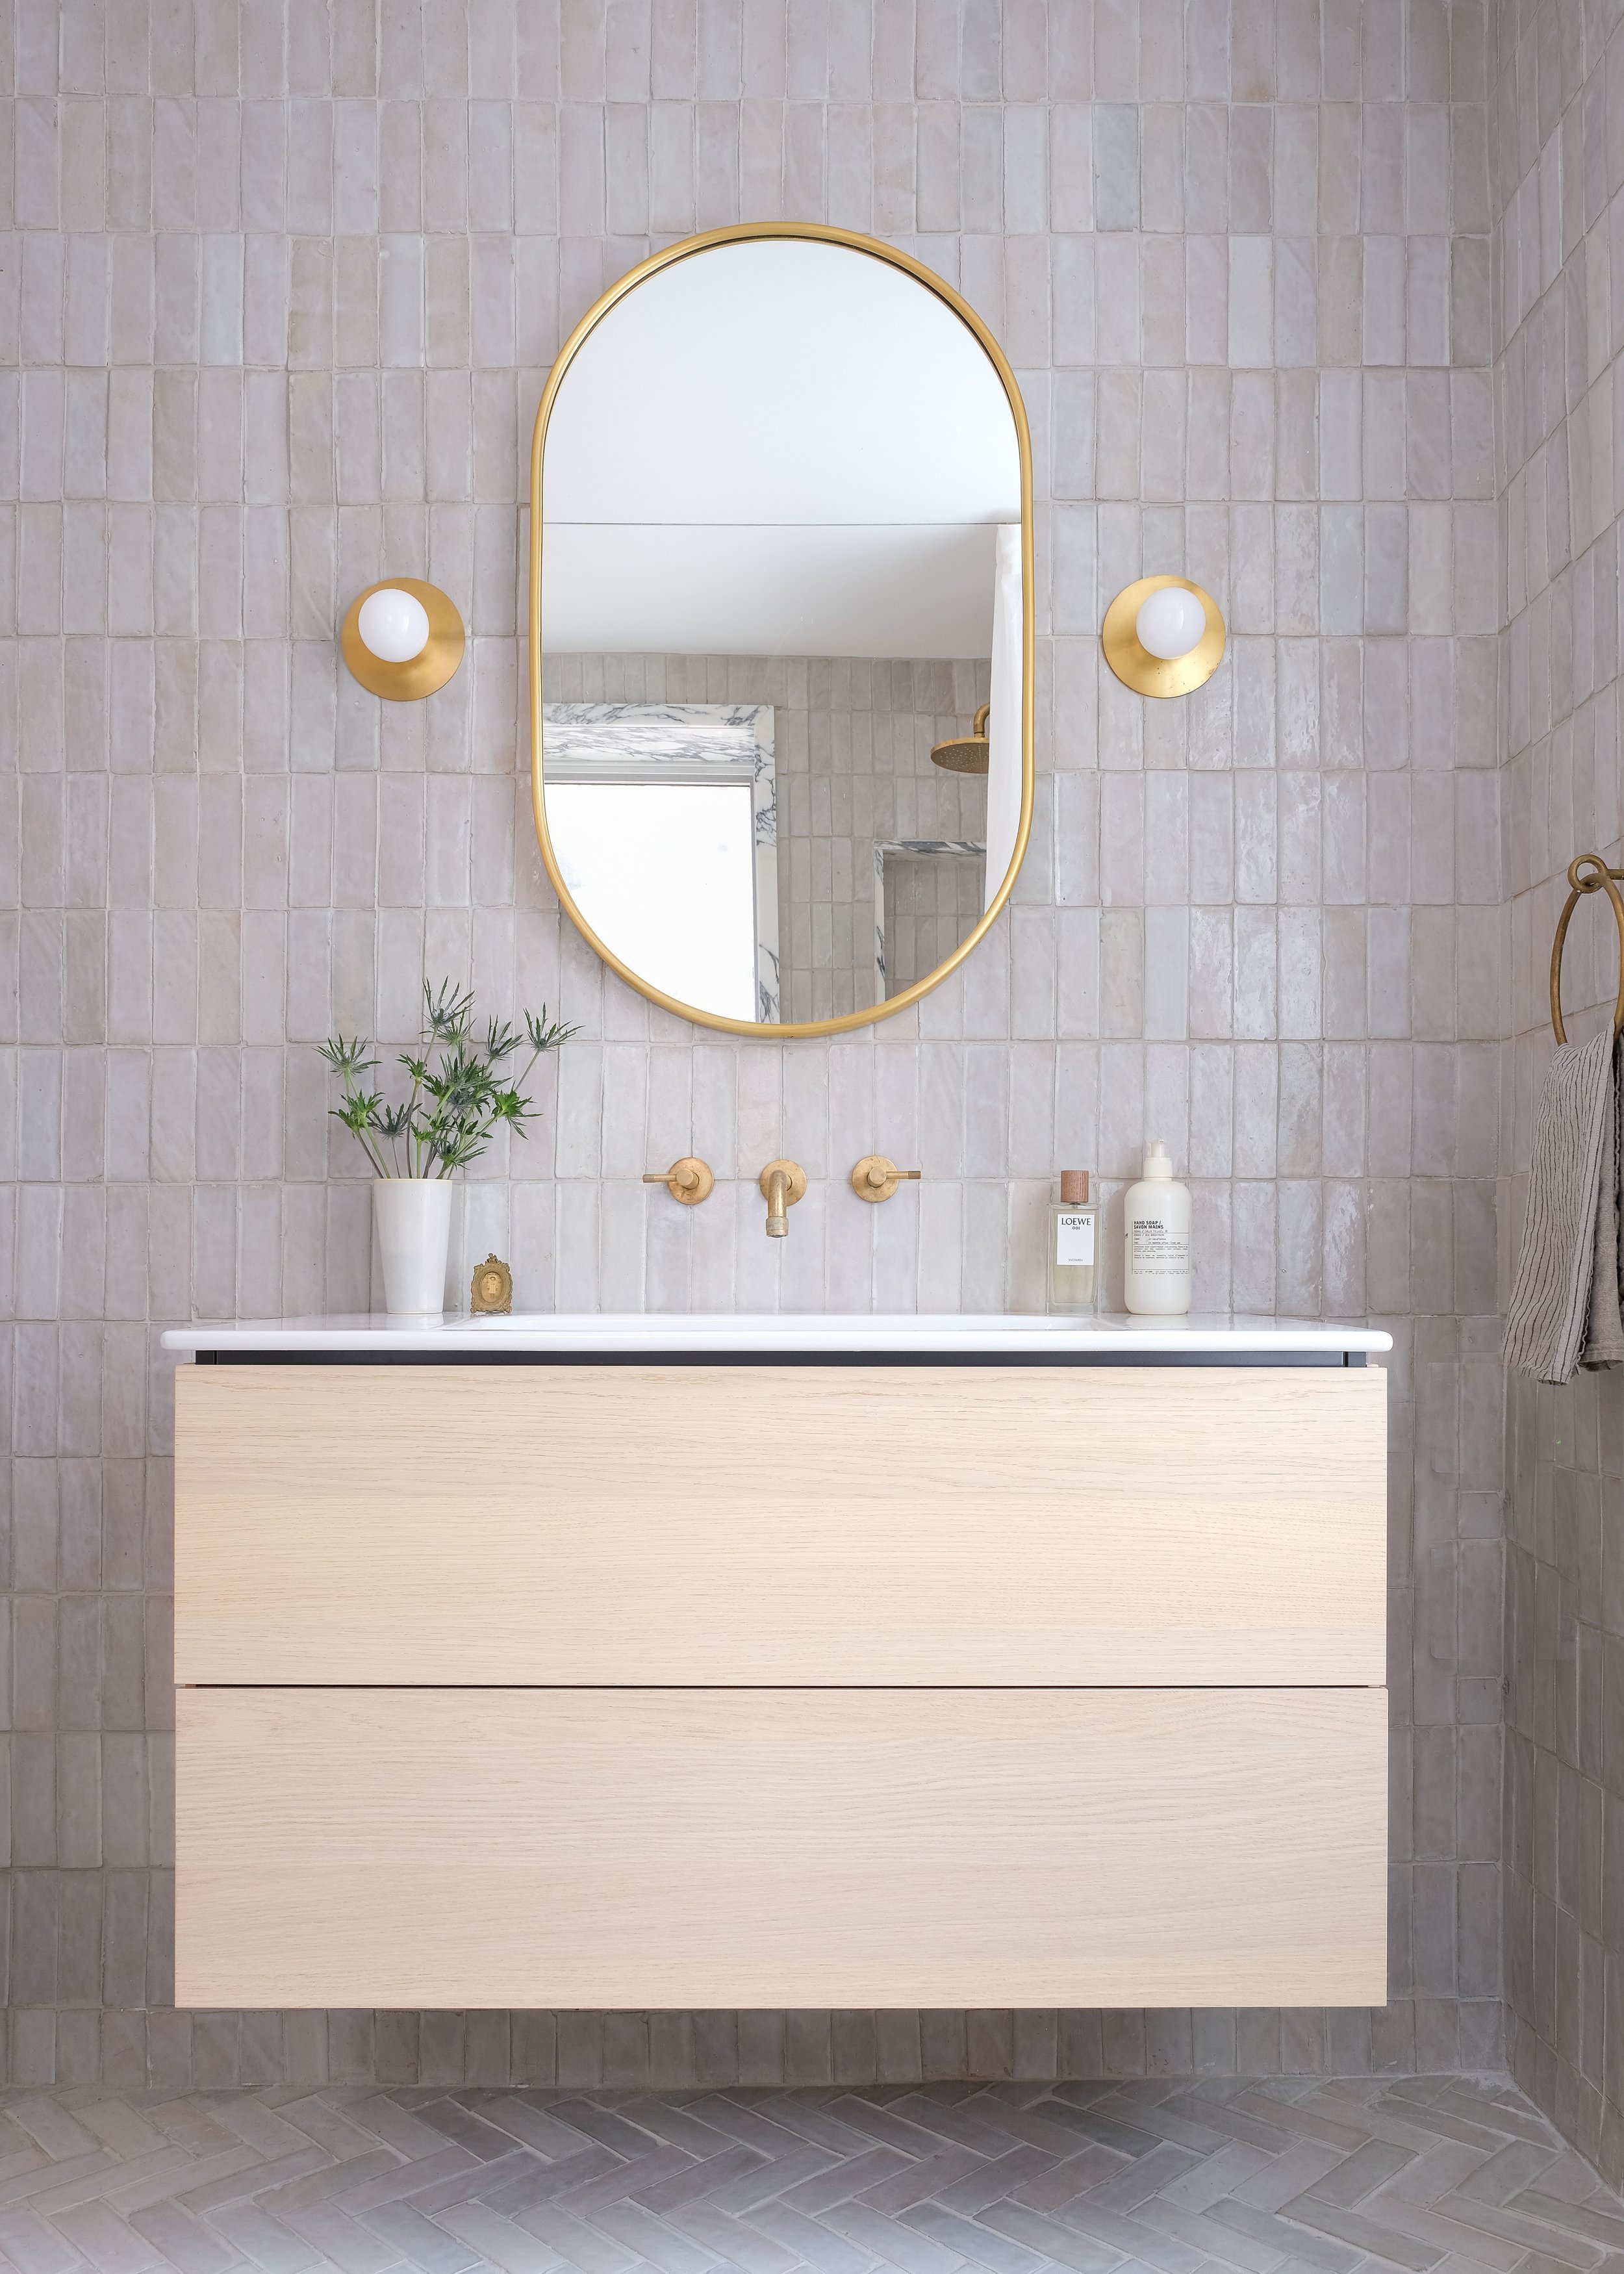
While there were some additional zigs and zags added to the design and build process, we love the end result. The zellige tile feels great underfoot and we love the way the natural brass accents and contrasting marble layer together with the soft linen curtains to create a perfectly imperfect bathroom that’s clean and modern. Mission accomplished.
MATERIALS AND SOURCE GUIDE
Tile: Natural White, Riad Tile , Vanity: Duravit L Cube , Faucet: Brodware Yokato Wall Set , Towel ring: Mi & Gei Forme No 13 , Wall sconce: Allied Maker Mini Orb , Shower faucet: Brodware Yokato Shower Set